Customized location of buttons
After you have integrated the PasswordFree app into your BigCommerce store website, the Sign in PasswordFree and Sign up PasswordFree buttons are displayed on your webstore's main page. However, in some cases you can place the buttons in other places of your BigCommerce store website:
- if you have customized your webstore in such a way that the Sign in PasswordFree and Sign up PasswordFree buttons are not displayed
- if you want to place the Sign in PasswordFree and Sign up PasswordFree buttons on any other page of your webstore apart from the main page.
Before you begin
- The customized placement of the buttons is available in Page Builder or any other tool you are using to design the pages of your website. For more details on Page Builder, go to Page Builder.
- For the buttons to operate properly in the selected place, you will need their URLs. To obtain them, perform the following steps:
1. Open the main page of your BigCommerce webstore and navigate to the Sign in or Register buttons.

2. Click Sign in > Sign in PasswordFree.

3. On the PasswordFree sign-in page, copy the URL from the address bar.

4. Save the copied URL in any convenient place to be used later.
5. Repeat the steps with the Register button.
Procedure
1. Select the place where you want to locate the Sign in and Register buttons.
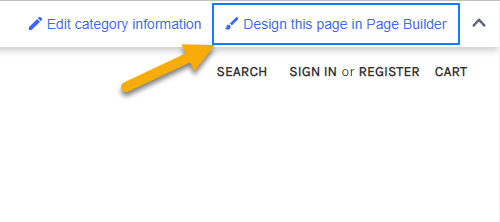
2. Click Design this page in Page Builder in the top right corner of the page or open the corresponding code for editing.
3. The selected page opens in design mode.

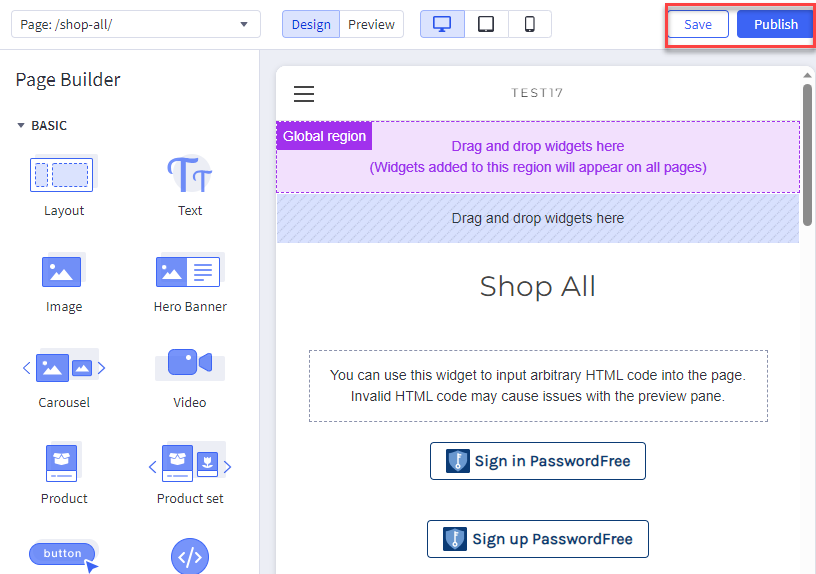
4. Select the HTML widget from the list of widgets in the left sidebar. Then, drag and drop the HTML widget in the place where you want to locate your button. When you add the widget to page sections marked as Global or Global region, the button shall be displayed on all pages.
5. In the left sidebar, the HTML editor appears.
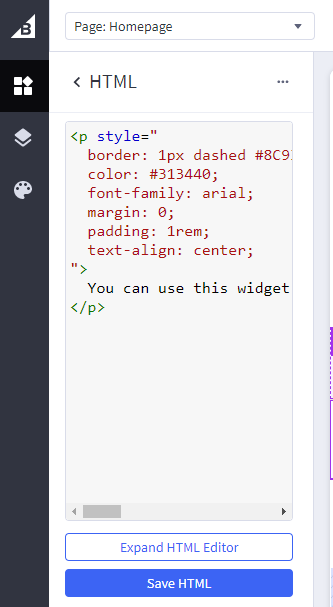
6. Replace the HTML code in the editor with the following:
- For Sign in PasswordFree button:
<div style="display: flex; justify-content: center; align-items: center; width: 100%; padding: 20px 0px;">
<button type="button" style="display: flex; justify-content: center; align-items: center; gap: 5px; padding: 6px 15px; font-family: inherit; font-weight: 600; font-size: 16px; color: rgb(11, 59, 117); background-color: rgb(255, 255, 255); border: 1px solid rgb(11, 59, 117); border-radius: 4px; cursor: pointer; "onclick="location.href='INSERT URL';">
<img src="https://bc-integration-qa01.identite.us/passwordfree-default.png" alt="logo">
<span>Sign in PasswordFree</span>
</button>
</div>
- For Sign up PasswordFree button:
<div style="display: flex; justify-content: center; align-items: center; width: 100%; padding: 20px 0px;">
<button type="button" style="display: flex; justify-content: center; align-items: center; gap: 5px; padding: 6px 15px; font-family: inherit; font-weight: 600; font-size: 16px; color: rgb(11, 59, 117); background-color: rgb(255, 255, 255); border: 1px solid rgb(11, 59, 117); border-radius: 4px; cursor: pointer; "onclick="location.href='INSERT URL';">
<img src="https://bc-integration-qa01.identite.us/passwordfree-default.png" alt="logo">
<span>Sign up PasswordFree</span>
</button>
</div>
7. Replace the INSERT URL with the following URLs:
- For Sign in PasswordFree button - with the URL of the Sign in PasswordFree page saved as specified above.
- For Sign up PasswordFree button - with the URL of the Sign up PasswordFree page saved as specified above.
8. Click Save HTML in the HTML editor.
9. To publish your changes, click Save, then click Publish.
10. In the following dialogue box, click Publish.

11. Click the BigCommerce icon to return to the control panel.
